March 13, 2025 / by Solera Holdings
What Does a Leak Down Test Tell You? A Mechanic’s Guide
Various automotive tests help inform the final diagnosis of any issues a vehicle might experience, from an alignment to a cylinder leak down test. If you want to know how healthy your engine is as it sits, doing a cylinder leak down test can give you the results. Interpreting those results is where you’ll begin to understand what work your engine needs now or potentially in the future.
The guide below explores the purpose and process of a cylinder leak down test, which is vital to diagnosing engine issues like loss of compression and valve damage. Mechanics can use the step-by-step instructions below to complete the test accurately. Identifix’s mobile diagnostic and repair tools enable technicians to investigate the root cause(s) of engine compression loss further using the comprehensive Direct-Hit® auto repair database.
What is the Purpose of a Cylinder Leak Down Test?
A cylinder leak down test determines whether the engine—specifically, the cylinder—can hold pressure, which is necessary for efficient combustion. By performing a leak down test, car owners can quantify the percentage of air lost and locate the source of these leaks. This percentage also provides vital insight into the engine’s long-term health.
Cylinder leak down tests are closely related to compression tests, which determine whether the engine can produce pressure. Cylinders with low compression typically leak. These leaks can lead to symptoms such as rough idle, poor performance, and misfires.
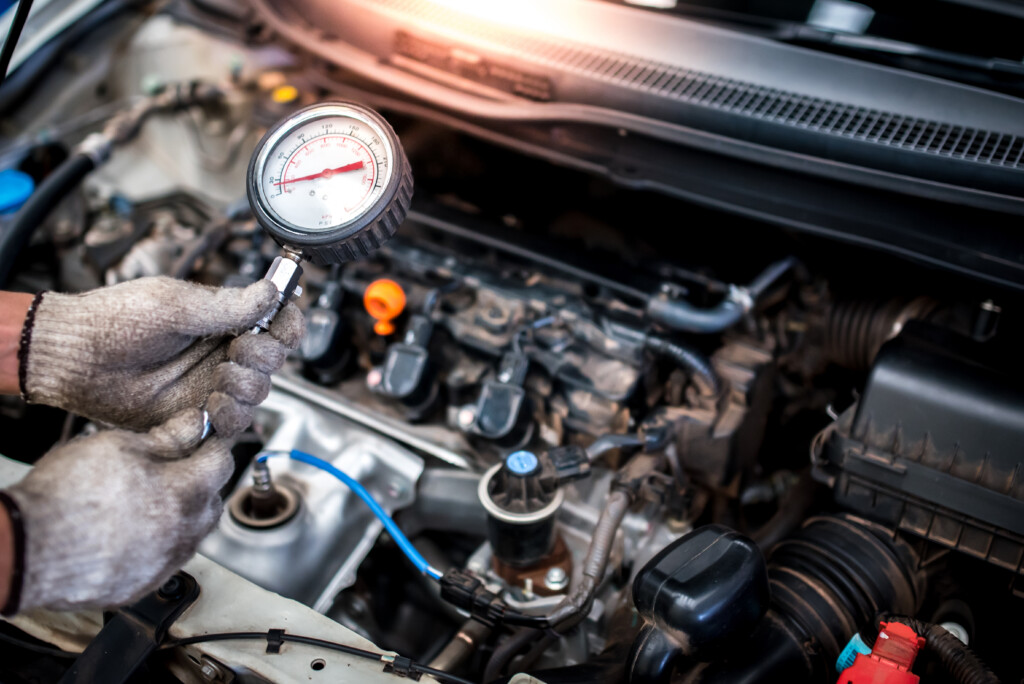
How to Perform a Cylinder Leak Down Test
The results of a cylinder leak down test are only valuable if you perform the test correctly. Use the following steps to test your engine’s ability to hold pressure in the cylinders. You’ll need a leak down tester, industrial-grade air compressor, ratchet, extension, sockets, breaker bar, and spark plug socket.
1. Achieve Engine Operating Temperature
Bringing the engine up to operating temperature expands the piston rings for a tighter seal and more accurate results. When you’ve achieved operating temps, turn the car off and set the parking brake. Ensure the vehicle is in gear.
2. Remove the Spark Plug
After raising the hood, locate the cylinder you’d like to test first. Remove the ignition coil and spark plug. Even if you plan on testing the other cylinders, leaving those spark plugs installed can help keep the engine in the proper position as you test.
3. Ensure the Piston is at TDC
The piston within the cylinder you’re testing should be at the top dead center (TDC) of its compression stroke. Using a breaker bar, use the crankshaft pulley nut to index the engine properly. Remove the breaker bar before pressurizing the cylinder.
4. Begin the Leak Down Test
Install the air adapter into the spark plug hole. Bleed the system so the pressure gauge reads zero. Then, begin pressurizing the cylinder to obtain a reading.
5. Record the Results
Note the leak percentages of each cylinder you test, making special note of the position of the cylinder if you’re unsure which one it is. If you plan on testing more than one cylinder, repeat Steps 2 through 4 above. Compare your results to evaluate your engine’s overall health.
Key Takeaways From Leak Down Testing
A cylinder’s ability to hold pressure has several implications, the least of which is its functionality. Each cylinder must maintain pressure within the combustion process to function properly, regardless of how many cylinders there are. Below, learn how to apply the results of a leak down test and evaluate the health of your vehicle’s engine.
Interpreting the Results
Healthy engines have a small amount of cylinder leakage, typically less than 10%. All cylinders should be within a few percentage points of one another. However, any readings above 30% require immediate attention.
Cylinders with 15% to 20% leakage indicate an issue that’s evident but not yet severe. However, prompt action can extend the life of your vehicle’s engine. If the readings you receive are exceedingly higher than 30%, repeat the test carefully to verify your results.
Identifying Leak Pathways
The location from which air leaks during a cylinder leak down test provides a viable starting point for further diagnosis. For example, air escaping from the oil filler cap, dipstick tube, valve cover breather, or PCV valve indicates worn piston rings or scored cylinder walls. Air bubbles in the coolant mean a cracked cylinder head or blown head gasket.
If you see air exiting through the throttle body or air inlet, this is an exceedingly bad sign. Replacing the corresponding broken or bent intake valve is vital to the engine’s longevity. Although not as severe as a bad intake valve, defective exhaust valves indicated by air exiting the tailpipe should also be addressed promptly.
Repair Solutions
Most repairs associated with a failed leak down test involve rebuilding or replacing the engine. For example, damage to the intake and exhaust valves requires replacing them for better compression. In some cases, the repair may involve one component, while in others, it may require tackling multiple issues.
From Testing to Repairs: Maximizing Your Productivity
Cylinder testing can help confirm a diagnosis or provide additional information to guide subsequent repairs. Use diagnostic and repair solutions like Identifix Direct-Hit and Direct-Hit Mobile to access the information you need. Discover the many resources you can have at your fingertips by contacting us today.
Did you like this article? Find more great content at identifx.com/blogs and solera.com/blog.